Assembly Steps for Rosette Scaffolding
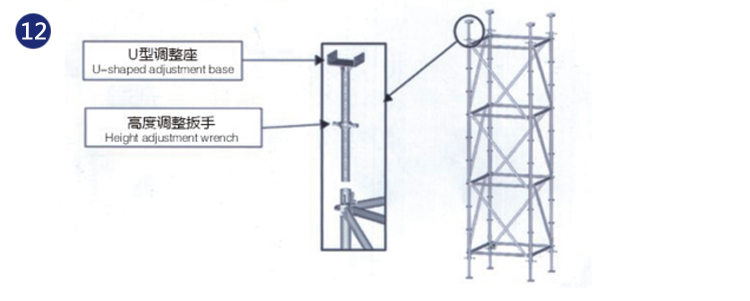
1.Adjustable Base Jack
After lofting in accordance with the dimensions of the scaffolding configuration diagram, arrange the adjustment base jack to the fixed point
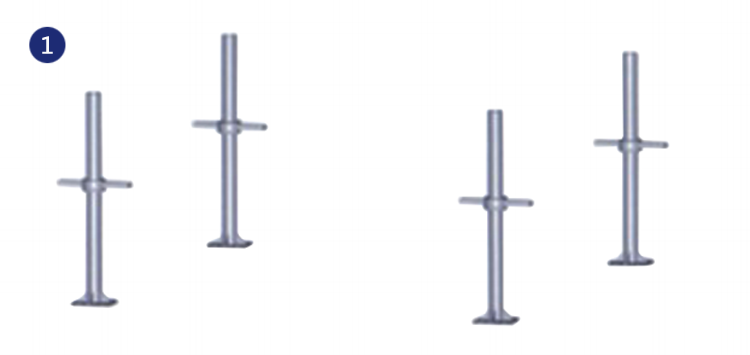
2.Base
Place the sleeve of standard against the upper part of the adjustment base jack, and the lower edge of the base must be completely inserted into the groove of the force plane of the wrench
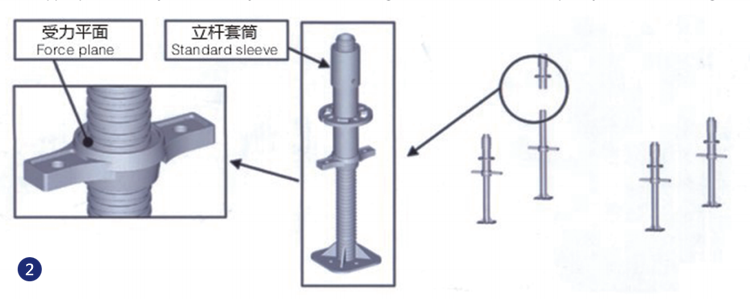
3.First Level Ledgers
Place the wedge head of ledger over the rosette so that the front end of the ledger presses against the round rube of standard. and then insert the wedge pin through the hole and tighten it with a hammer.
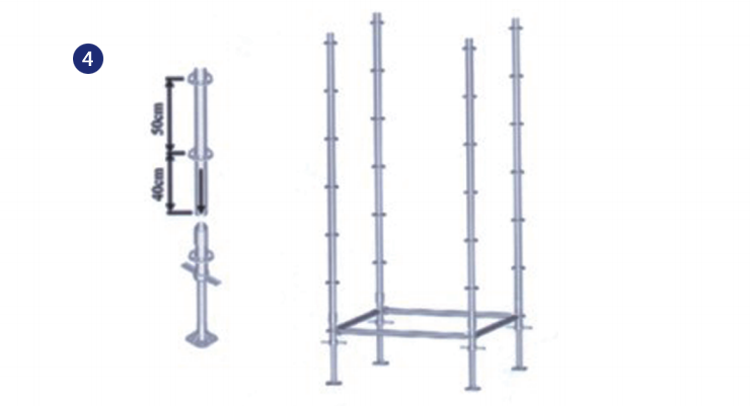
4.Base Standard
All standards without extra connecting lever are collectively referred to as base stand-ards. Insert the long end of base standard into the sleeve of the base as shown in the Figure on the right. Check through inspection hole if the base standard is inserted into the bottom of the sleeve. Base standards are only used in the first level of erection, while standards are used for all the other levels.
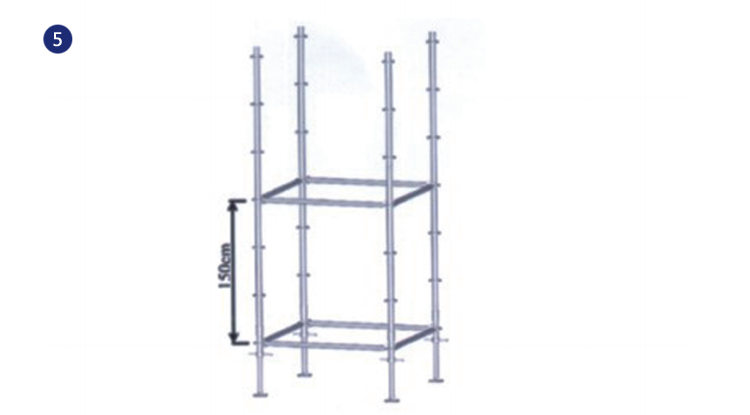
5.Second Level Ledgers
Assemble the second level ledgers according to Step 3 as shown in the Figure below
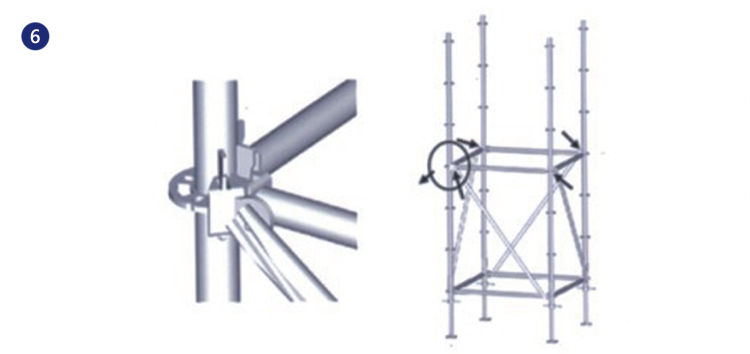
6.First Level Vertical Diagonal Braces
Assembly all vertical diagonal braces clockwise or counterclockwise as shown in the Figure below. Place vertical diagonal brace over the rosette, so that the front end of vertical diagonal brace presses against the round rube of standard, and then insert the wedge pin through the hole and tighten it with a hammer. Note: The vertical diagonal
Braces are of directional properties. Lapping cannot be completed in case of wrong direction.
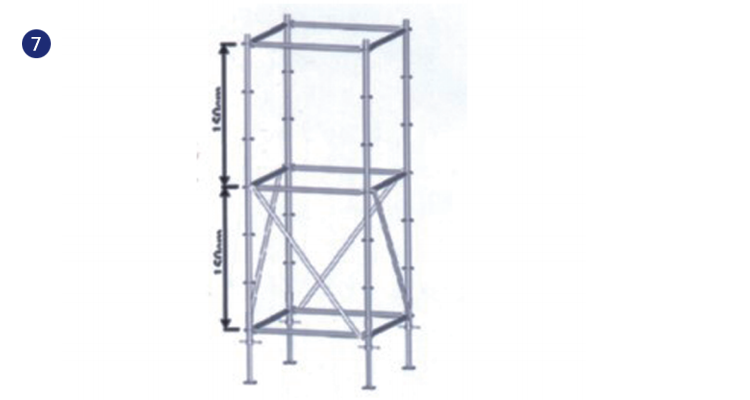
7 Third Level Ledgers
Assemble the third level ledgers according to Step 3 as shown in the figure below
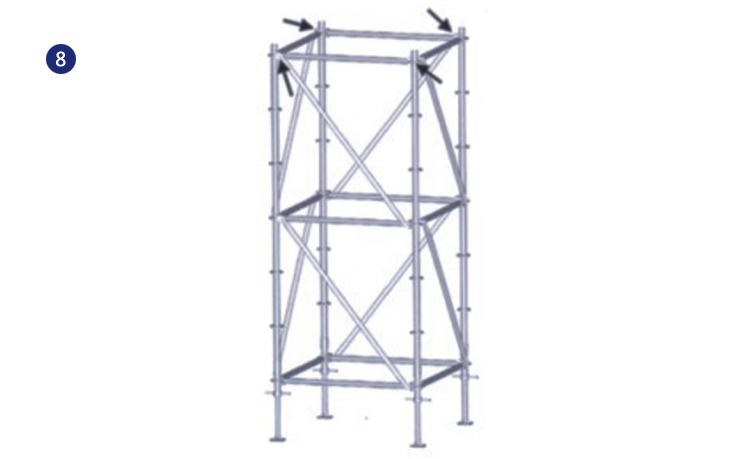
8. Second Level Vertical Diagonal Braces
Assemble the second level vertical diagonal braces according to Step 6 as shown in the Figure on the right in the same direction with the first level.
If the first level is counterclockwise, then all the other levels should be assembled counterclockwise
9.Connect standards with square tube(connecting lever) as shown in the Figure below, through inserting the connecting lever into the standard at the lower level. In case standard pin is applied, be sure to check whether the rosette alignment holes are in the same direction
10 Fourth Level Ledgers
Assemble the fourth level ledgers according to Step 3 as shown in the Figure below.Ledgers are required per 150cm it heights in accordance with the actual height of the scaffolding (under the U shaped adjustment base). regardless of the assembly levels, the lift height shall not exceed 150cm
11 Third Level Vertical Diagonal Braces Assemble the third level vertical diagonal braces according to Step 6 as shown in the Figure below in the same direction with the first and second level.

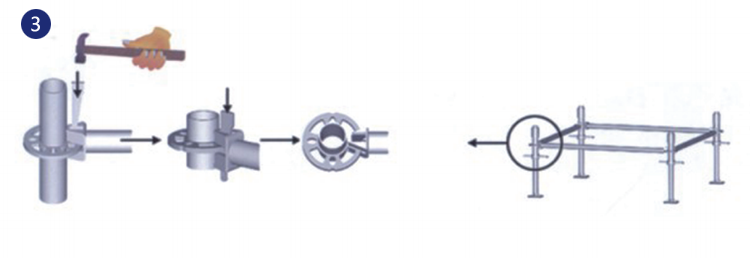
12.U-shaped Adjustment Base
Insert the threaded tube of U-shaped adjustment base into the standard tube as shown in the Figure on the right, and then adjust with wrench to the required height.